
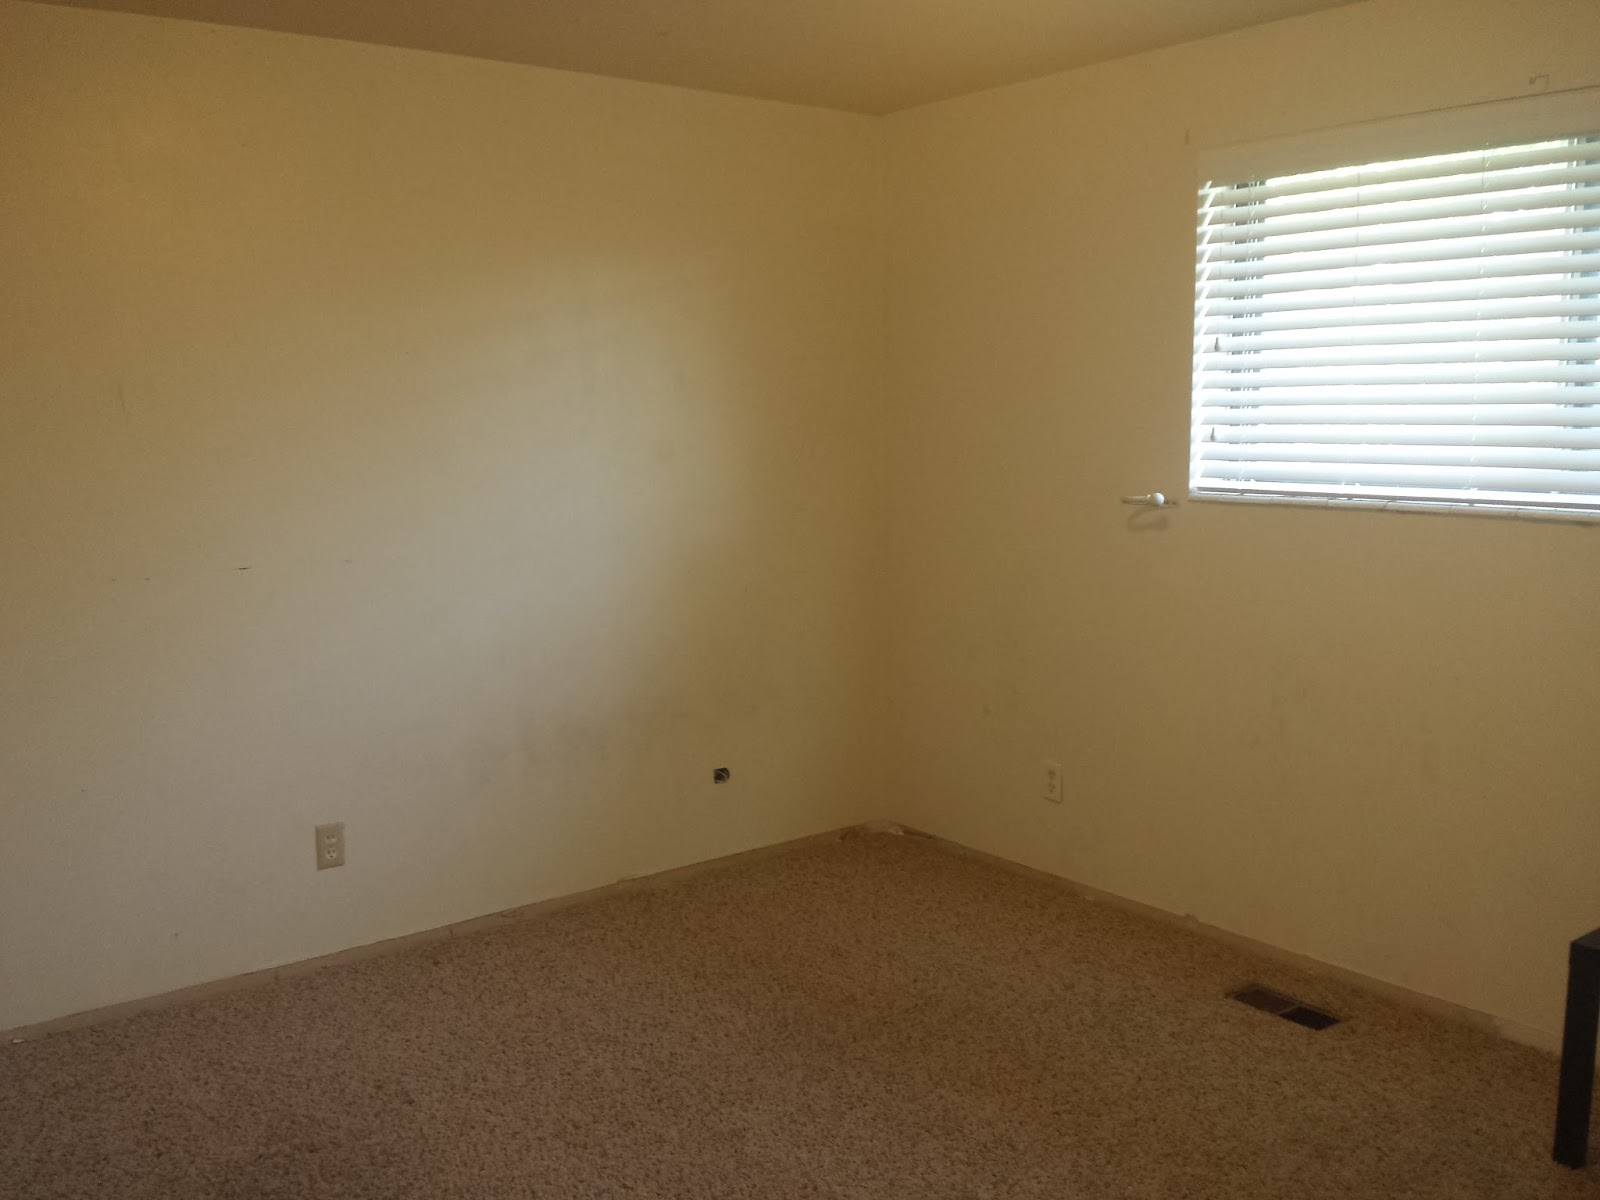
Once upon a time, we had a guest bedroom upstairs. We rarely have guests, so the room somehow morphed into a junk/catch all type of room. And. It. Was. Bad. The picture below was taken after we removed a queen bed out and did some cleaning. So you can imagine how much worse it was before.

In our current house, the master bedroom is in the basement. When we found out we were pregnant, I knew that we would have to move Blake out of the second bedroom downstairs so the new baby could be close to us. The big question was whether to move Blake into the spare room, or move her into Will's room. On a whim one day, I decided to move her into Will's room.

I knew as a parent that it would be easier to keep them in separate rooms. They both don't seem to sleep very well unless they are in their own rooms. However, I felt it would be good for them to share for a little while. Plus, if I put them in the same room, then it left the spare room to turn into a toy room. This idea really appealed to me because I wanted their bedrooms to be the place where the sleep and get dressed. And hopefully (crossing my fingers) having a toy room will keep the toys a little more contained and not have them constantly scattered throughout several rooms.

Sharing a bedroom has been quite an adjustment. Instead of both kids quiet and asleep between 8pm-8:30pm, there is talking, screaming, crying, things being thrown, running around, etc. It is quite a circus once the parents retire downstairs. They have been sharing a room for a few months, and it hasn't gotten much better. It was also Blake's first time in a toddler bed, so that was kind of a double transition for her. Even though it has been difficult, I am happy with the arrangement and think it is good for the kids.
Several weeks after we moved Blake upstairs, I decided it was time to get started on the toy room. I'm talking full room overhaul.
I started by emptying the room and ripping out all of the old baseboards. These baseboards weren't quite as difficult as our pantry ones, but it wasn't an easy job. They were wedged in pretty tight and it was hard to get them away from the carpet.
After a couple of hours with a hammer and pry bar, all of the baseboards were gone and I was ready to paint. Choosing paint colors was the hardest part of the entire job. I couldn't decide what I wanted. First I thought I would make it more girly and it could eventually be the girls' room. But then I ended up doing what I had planned for Will's room. I think we will use it as a toy room for a few years, then Will can move over and it can be his room.

While the paint was drying, I updated all of the old tan electrical outlets with new white ones, and I updated our light switch.

Then I started working on the baseboards and trim. I had learned a lot from Lance while doing our living room and I felt pretty confident that I could do it alone. So one day while Lance was at work, I did the baseboards. And so you can fully appreciate what that entails:
-First I have to prime all of the wood.
-After it dries for several hours, I have to paint the boards.
-Once that is dry, I have to carefully cut each board so that it fits perfectly.
-Then I nail them into the wall.
-After the entire room was finished, I have to go back and spackle/putty all of the nail holes.
-Once the putty is dry, I sand it down so that it is smooth and blends in.
-Then I touch up the paint around every nail hole.
-Then I caulk the edges.
-The caulk smears quite a bit, so once the caulk is dry, I had to repaint all the edges.

It isn't difficult, but it is definitely a process and time consuming. And because of all the waiting for different parts to dry, it takes several days/weeks.
Here is what our door looked like before.

Here is the door after I ripped out trim, painted, and replaced the light switch.

And to complete the look, I added trim, replaced the door with a newer style, and added new hardware. What a difference!

Similar with the closet. Here is the before.

I trimmed out the entire closet, put a fresh coat of paint on the doors, and added new hardware. I love the difference a little bit of trim makes.

I also wanted to add trim to the windows and get rid of the tile along the bottom.


I watched a few tutorials on YouTube and learned the most effective way to get the tile out.

So here is the window before. Plain, boring, nothing special.

So here is the window before. Plain, boring, nothing special.

And this is what it looks like now. It makes such a statement, and I love how it turned out.

Here is a closer view.


Once the entire room was finished with baseboards, trim, paint, etc. it was time to work on some decorations.
I went to Lowe's and found some cheap scraps of wood and made this railroad track to go across the bottom of one of the walls. I bought some wood for the sign, painted it, and had some vinyl cut to make the "railroad crossing" sign.

I designed the room to have one of the walls be an "art station". I wanted a large chalkboard. They can be pretty pricey, so I decided to make one myself. I also wanted it to be magnetic, so I bought a large sheet of metal, painted it with chalk board paint, attached it to a board, then made a frame to go around the edges.

Here is a picture of the first half of the room.

For the other half of the room, I wanted to build a little grocery store for the kids. I saw this link on Pinterest and knew it was something I could handle.

The kids were so excited about The Market and could not wait until I finished so they could play. They immediately got some grocery bags and started filling their carts with their toy food and pretending to shop.


Lastly came organizing the closet. Before, it was my craft area and spot to put anything I didn't want out. It wasn't exactly the easiest spot to sew or do any real "crafting".

I moved all of my junk out and gathered all of our toys throughout the house and tried to find a place for them in the closet.

We spent the day organizing and finishing up some last minute details. Here is the completed room.


We got some chalk and let the kids loose on their new toy room.

So far, they are loving it. (Notice the awesome train that Will drew.)


Bobbi you are so talented! It looks great and will be great fun for the kids.
ReplyDelete